
9th Sep 2026
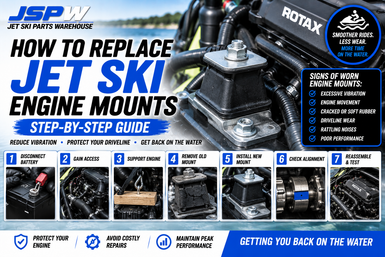
How To Replace Jet Ski Engine Mounts: A Step-By-Step Guide
Your jet ski's engine mounts have a simple but important job: securely hold the engine in the correct position while isolating vibration from the hull.
Over time, the rubber inside the mounts can crack, soften, separate or deteriorate. When this happens, the engine may move excessively under load and the driveline can become misaligned.
Ignoring damaged engine mounts can potentially contribute to vibration, driveshaft wear, coupling problems and damage to other driveline components.
Whether you own a Sea-Doo, Yamaha or Kawasaki, here's what to look for and the basic process involved in replacing worn engine mounts.
What Do Jet Ski Engine Mounts Do?
Jet ski engines aren't normally bolted directly to the hull.
Rubber-insulated engine mounts sit between the engine and its mounting points.
They help:
-
Hold the engine securely
-
Maintain driveline alignment
-
Reduce vibration
-
Absorb engine movement
-
Protect surrounding components
The mounts also help maintain the correct relationship between the engine, driveshaft and jet pump.
That's why alignment becomes so important when mounts are replaced.
Signs Your Engine Mounts May Need Replacing
1. Excessive Engine Vibration
One of the most common symptoms is increased vibration.
You may notice:
-
More vibration through the hull
-
Roughness at particular RPM
-
Increased vibration at idle
-
New rattles or noises
Don't automatically blame the mounts, though. Impeller damage, pump bearings and other driveline problems can also cause vibration.
2. Excessive Engine Movement
With the engine switched off, inspect the mounts and engine position.
A badly damaged mount may allow noticeably more movement than the others.
You may also see the engine shift excessively when load is applied.
Never place your hands near moving engine or driveline components while the engine is running.
3. Cracked Rubber
Visually inspect each mount.
Look for:
-
Cracks
-
Splitting
-
Perished rubber
-
Separation
-
Distortion
If the rubber has separated from the metal portion of the mount, replacement is required.
4. Broken Engine Mount
A completely failed mount can allow significant engine movement.
Symptoms may include:
-
Heavy vibration
-
Clunking
-
Driveshaft noise
-
Alignment problems
-
Engine movement under acceleration
Don't continue riding with a broken engine mount.
5. Driveshaft Or Coupler Problems
Engine mount failure can affect driveline alignment.
If the engine isn't positioned correctly relative to the driveshaft and jet pump, you may experience:
-
Coupler wear
-
Driveshaft spline wear
-
Vibration
-
Seal problems
-
Premature bearing wear
If you're replacing driveline components because of unexplained wear, inspect the engine mounts as well.
6. Sea-Doo Carbon Ring Problems
On Sea-Doo models using a carbon-ring driveshaft seal, correct driveline alignment is particularly important.
If the engine is incorrectly aligned, additional stress may be placed on the driveshaft and sealing system.
If you're experiencing repeated or unusual carbon-ring problems, engine alignment and mount condition should be part of the inspection.
Before You Start
Replacing engine mounts varies significantly between models.
On some skis, individual mounts can be accessed relatively easily.
Others may require removal or movement of:
-
Exhaust components
-
Intake components
-
Jet pump
-
Driveshaft
-
Electrical components
-
Cooling hoses
-
Engine
Always check the workshop procedure for your exact model before starting.
Tools You May Need
Depending on the ski, you'll typically need:
-
Socket set
-
Spanners
-
Torque wrench
-
Engine lifting/support equipment
-
Screwdrivers
-
Marine grease
-
Suitable lifting strap
-
Engine alignment tools
-
Replacement engine mounts
-
Workshop manual
Don't attempt to support a heavy engine using improvised equipment that isn't capable of safely carrying the load.
Step 1: Disconnect The Battery
Before working around the engine:
-
Remove the safety lanyard.
-
Switch everything off.
-
Disconnect the battery.
Disconnect the negative terminal first.
This prevents accidental starter operation while you're working around the engine and driveline.
Step 2: Gain Access To The Engine Mounts
Remove whatever components prevent access to the mounts.
Depending on the model, this might include:
-
Seats
-
Storage compartments
-
Exhaust components
-
Intake components
-
Electrical brackets
Take photos before disconnecting hoses or wiring.
They can be extremely useful during reassembly.
Step 3: Inspect All Engine Mounts
Don't immediately replace the first damaged mount you find.
Inspect every mount.
Look for:
-
Cracked rubber
-
Separation
-
Corrosion
-
Loose hardware
-
Distortion
-
Broken mounting brackets
If one mount has failed because of age, the others may not be far behind.
Step 4: Record Shim Locations
This step is extremely important.
Some jet skis use shims underneath the engine mounts to establish correct engine and coupling alignment.
Before removing anything:
Record exactly where every shim is located.
Keep the shims separated and labelled, for example:
-
Front left
-
Front right
-
Rear left
-
Rear right
Don't simply throw all the shims into one container.
Their position can affect engine alignment.
Step 5: Support The Engine
Before removing an engine mount, properly support the engine.
The goal is to take the engine's weight off the mount without unnecessarily moving the engine out of position.
Depending on the ski and workshop procedure, this may involve an engine hoist or suitable lifting/support equipment.
Never work underneath an unsupported engine.
Step 6: Remove The Old Engine Mount
With the engine properly supported:
-
Remove the mount retaining hardware.
-
Carefully raise or reposition the engine only as much as required.
-
Remove the old mount.
-
Keep any shims with their original location.
Compare the old mount with the replacement.
Confirm:
-
Mounting points match
-
Height is correct
-
Bolt pattern is correct
-
Replacement part number is correct
Step 7: Inspect The Mounting Area
Before installing the new mount, inspect:
-
Engine mounting bracket
-
Hull mounting point
-
Threads
-
Bolts
-
Washers
-
Shims
Look for corrosion, cracks or damaged threads.
Installing a new engine mount onto a damaged mounting surface won't solve the underlying problem.
Step 8: Install The New Mount
Position the new engine mount correctly.
Reinstall the original shims in their recorded positions as a starting point.
Fit the mounting hardware according to the manufacturer's procedure.
Depending on the model, some fasteners may remain loose until engine alignment has been checked.
Don't simply tighten everything immediately unless the service procedure specifies it.
Step 9: Repeat For Other Mounts
If you're replacing multiple mounts, work carefully and maintain control of the engine position.
Keep track of:
-
Mount locations
-
Shims
-
Hardware
-
Orientation
Don't assume every mount is identical.
Some skis use different mounts or mounting arrangements at different positions.
Step 10: Check Engine Alignment
This is the step that shouldn't be skipped.
After replacing engine mounts, the engine's relationship to the driveshaft and jet pump may need to be checked.
Depending on the manufacturer and model, alignment may involve:
-
Dedicated alignment shaft
-
Engine alignment fixture
-
Coupling clearance measurements
-
Adding or removing shims
-
Moving the engine slightly
The exact specification and procedure varies between skis.
Always use the workshop specification for your model.
Why Engine Alignment Matters
The engine, driveshaft and jet pump need to operate along the correct centreline.
Incorrect alignment can contribute to:
-
Vibration
-
Coupler wear
-
Driveshaft wear
-
Bearing damage
-
Seal wear
-
Carbon-ring problems on applicable Sea-Doos
Replacing the mounts but ignoring alignment can create another problem shortly afterwards.
Step 11: Adjust Shims If Required
If the alignment isn't within specification, the engine position may need adjustment.
Depending on the model, this can involve adding, removing or repositioning alignment shims.
Don't guess shim thickness.
Follow the manufacturer's measurement procedure.
Even small changes can affect driveline alignment.
Step 12: Torque The Engine Mount Hardware
Once alignment is correct, tighten the engine mount hardware to the specified torque.
Torque specifications vary between models.
Don't rely on a universal engine-mount torque figure.
After tightening, recheck alignment if the workshop procedure requires it.
Step 13: Reassemble The Jet Ski
Reinstall any components removed for access.
Check:
-
Cooling hoses
-
Exhaust connections
-
Electrical connectors
-
Ground cables
-
Fuel-system connections
-
Driveshaft components
-
Jet pump
-
Steering and reverse components
Make sure no tools or loose hardware remain inside the hull.
Step 14: Inspect Before Starting
Before reconnecting the battery and starting the engine, perform a final inspection.
Check that:
-
Engine mounts are secure
-
Alignment has been verified
-
Hoses are connected
-
Electrical connectors are secure
-
Fuel connections are secure
-
Driveshaft components are correctly installed
-
Nothing can contact moving components
Reconnect the battery using the correct connection order.
Step 15: Test For Vibration
Start the engine according to the manufacturer's procedure.
Listen for:
-
Abnormal vibration
-
Clunking
-
Grinding
-
Driveshaft noise
-
Unusual movement
Don't run the ski out of the water longer than the manufacturer permits.
The final test should be performed carefully on the water.
What Causes Jet Ski Engine Mounts To Fail?
Engine mounts can deteriorate because of:
-
Age
-
Heat
-
Oil or fuel contamination
-
Saltwater corrosion
-
Engine vibration
-
Impact damage
-
Incorrect engine alignment
-
Excessive engine movement
Older skis should have their mounts inspected periodically even if no obvious symptoms are present.
Should You Replace All Engine Mounts At Once?
Not necessarily.
If only one mount is damaged and the others are in excellent condition, replacing the failed mount may be appropriate.
However, if the mounts are all the same age and several show deterioration, replacing them together can make sense.
Regardless of how many are replaced, inspect the complete mounting system and verify alignment where required.
Don't Throw Away The Old Shims
This deserves repeating.
If your ski uses engine-alignment shims:
Keep them organised by location.
Their thickness and position may be critical to maintaining the correct engine alignment.
The original shim arrangement provides an important starting point when installing the replacement mounts.
Quick Engine Mount Checklist
If you suspect engine mount problems, check:
-
Excessive vibration
-
Engine movement
-
Cracked rubber
-
Separation between rubber and metal
-
Loose mounting hardware
-
Driveshaft or coupler wear
-
Seal problems
-
Engine alignment
Replacing the rubber mount is only part of the job.
Correct alignment is what ensures the entire driveline works together properly.
Need Replacement Jet Ski Engine Mounts?
Jet Ski Parts Warehouse stocks engine and driveline components for Sea-Doo, Yamaha and Kawasaki jet skis, including:
-
Engine mounts
-
Engine mounting brackets
-
Mounting hardware
-
Driveshafts
-
Couplers
-
Carbon rings
-
Driveshaft seals
-
Jet pump components
-
Bearings and seals
-
Genuine OEM parts
-
Premium aftermarket replacements
-
Quality used OEM components
If you're unsure which engine mount fits your jet ski, contact JSPW with your make, model, year and OEM part number where available, and we'll help identify the correct replacement.
Final Thoughts
Replacing a jet ski engine mount isn't necessarily difficult, but getting the engine back into the correct position is critical.
Don't simply remove the old mount, bolt the new one in and assume the job is finished.
Record your shim positions, support the engine correctly and verify the engine/driveline alignment using the procedure specified for your model.
Correctly installed mounts will reduce vibration, protect the driveshaft and jet pump and help keep your Sea-Doo, Yamaha or Kawasaki running smoothly for years to come.