
7th Oct 2026
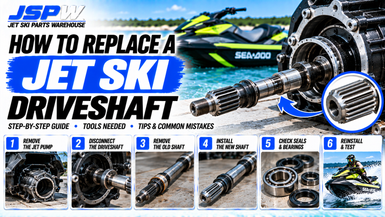
How To Replace A Jet Ski Driveshaft
The driveshaft is one of the most important components in a jet ski's propulsion system. It transfers power from the engine to the jet pump, allowing the impeller to turn and produce thrust.
When a driveshaft becomes bent, worn, damaged or excessively corroded, it can cause vibration, unusual noises, poor performance and, in serious cases, damage to the jet pump or engine-side components.
Replacing one isn't necessarily difficult for an experienced technician, but the procedure varies considerably between Sea-Doo, Yamaha and Kawasaki, and even between model generations.
For example, Sea-Doo service manuals generally require the jet pump to be removed before replacing drive-system components, while Yamaha procedures can involve removing the impeller, shaft hardware and bearings from the pump assembly. ManualsLib
What Does A Jet Ski Driveshaft Do?
The basic power path is:
Engine → Coupler/PTO → Driveshaft → Jet Pump → Impeller → Thrust
The driveshaft must remain accurately aligned because it rotates at high speed.
A damaged shaft can therefore cause more than just a vibration.
Potential consequences include:
- Excessive vibration
- Damaged bearings
- Seal failure
- Impeller damage
- Wear-ring damage
- Damaged splines
- Water entering the hull or engine-side sealing area
Signs Your Driveshaft May Need Replacing
1. Vibration At Speed
One of the biggest warning signs is a vibration that becomes stronger as RPM increases.
A bent shaft can cause the rotating assembly to run out of alignment.
However, don't immediately blame the driveshaft.
Similar symptoms can come from:
- Damaged impeller
- Worn jet-pump bearing
- Worn wear ring
- Engine mounts
- PTO/coupler problems
That's why the entire driveline should be inspected.
Sea-Doo service information specifically warns that excessive shaft deflection can cause vibration and damage to related components. ManualsLib
2. Damaged Or Worn Splines
The splined sections of the driveshaft transfer torque between components.
Inspect the splines for:
- Rounded edges
- Excessive wear
- Corrosion
- Missing material
- Cracks
- Fretting
- Abnormal wear patterns
Recent Sea-Doo service information specifically instructs technicians to inspect driveshaft splines and replace the shaft if they are damaged. ManualsLib
3. Visible Shaft Damage
Once removed, carefully inspect the entire shaft.
Look for:
- Bends
- Scoring
- Pitting
- Corrosion
- Cracks
- Damaged threads
- Damaged splines
Don't assume a shaft is straight simply because it looks straight on the bench.
4. Excessive Driveshaft Runout
Runout is one of the most important measurements.
A shaft can look perfectly straight but still be outside the manufacturer's allowable runout specification.
For example, one Yamaha WaveRunner service manual specifies a driveshaft runout limit of 0.01 mm (0.0004 in) for that particular model. studylib.net
That number should not be applied to every Yamaha or other PWC.
Always use the specification for the exact:
Make + Model + Year + Engine
A dial indicator is the appropriate way to accurately check runout.
5. Water Or Oil Around The Driveshaft Seal
A driveshaft passes through sealing components that prevent water from entering areas where it shouldn't.
A damaged seal can cause:
- Water leakage
- Oil leakage on applicable designs
- Corrosion
- Premature bearing wear
- Driveshaft damage
Sea-Doo's 4-TEC service information specifically highlights the importance of the driveshaft sealing lip and states that damage can allow water into the engine or oil to escape. ManualsLib
If you're replacing the driveshaft, carefully inspect the associated seals rather than automatically reusing old components.
Before Replacing The Driveshaft
Before ordering a new shaft, diagnose the problem.
Check the impeller
Look for:
- Bent blades
- Chips
- Cracks
- Uneven damage
Check the wear ring
Look for:
- Excessive clearance
- Deep grooves
- Damage
- Uneven wear
Check the jet-pump bearing
Check for:
- Excessive play
- Roughness
- Grinding
- Corrosion
Check the driveshaft
Look for:
- Runout
- Bent shaft
- Damaged splines
- Corrosion
Check the coupler/PTO
Inspect the connection between the engine and driveshaft for:
- Wear
- Damage
- Loose hardware
- Damaged splines
- Abnormal movement
This prevents replacing a good driveshaft when the actual problem is elsewhere.
Tools You May Need
The exact tools depend on the model, but a driveshaft replacement may require:
- Metric socket set
- Torque wrench
- Allen/hex keys
- Pliers
- Circlip pliers
- Driveshaft holder
- Impeller tool
- Bearing puller
- Seal installer
- Dial indicator
- Grease
- Manufacturer-specified sealant
- New O-rings/seals
- Workshop/service manual
Some Yamaha procedures use dedicated tools for the impeller, driveshaft and bearings, and specify pressing the shaft and bearings during assembly. manualzz.com
Step 1 — Secure The Jet Ski
Put the jet ski somewhere safe and stable.
Depending on the model, you may need to:
- Remove the seat
- Remove the relevant access panels
- Disconnect the battery
- Position the ski as specified by the service manual
If the procedure requires turning the ski on its side, follow the manufacturer's recommended orientation.
Step 2 — Remove The Jet Pump
On many jet skis, the jet pump has to come off before the driveshaft can be removed.
Sea-Doo service manuals explicitly state that the jet pump must be removed to replace drive-system components. ManualsLib
A typical pump removal involves disconnecting relevant:
- Reverse/steering components
- Water hoses
- Speed sensor
- Pump mounting hardware
Then the pump is pulled rearward from the hull.
Kawasaki service information similarly describes sliding the pump rearward to disengage the driveshaft before removing the pump. manualzz.com
Step 3 — Remove The Impeller Where Required
Depending on the design, the driveshaft may remain associated with the jet-pump assembly or need to be separated from it.
On many Yamaha designs, the procedure starts by removing the impeller and then the shaft hardware before removing the driveshaft. manualzz.com
Important: Some Yamaha impellers use left-hand threads.
For those applications, the service manual specifies turning the impeller clockwise to loosen it. manualzz.com
Never assume thread direction without checking your exact model.
Step 4 — Disconnect The Driveshaft From The Engine
The engine-side connection varies substantially.
Some systems use:
- Splined couplers
- PTO couplers
- Floating rings
- Circlips
- Sealing rings
- Dampers
Older Sea-Doo systems, for example, can require the shaft to be pulled rearward to disengage the coupler splines. ManualsLib
Some later Sea-Doo systems use specific tools and procedures around the PTO seal assembly and floating ring. ManualsLib
This is one of the reasons there isn't one universal driveshaft removal procedure for every jet ski.
Step 5 — Remove The Old Driveshaft
Once both ends are disconnected, carefully remove the shaft.
Don't force it against:
- Engine components
- PTO seals
- Bearings
- Hull fittings
- Pump components
If the shaft is stuck, use the manufacturer's recommended removal procedure.
For some older Sea-Doo models, the factory procedure specifies using a driveshaft puller when the shaft is stuck in the PTO flywheel/coupler. ManualsLib
Step 6 — Compare The New And Old Shafts
Before installing the new shaft, put them side by side.
Check:
- Overall length
- Diameter
- Spline count
- Spline position
- Thread size
- Circlip grooves
- Seal surfaces
- Coupler location
This is particularly important with aftermarket replacement parts.
A shaft that looks similar isn't necessarily the correct shaft.
Step 7 — Inspect The Related Components
This is the step that can save you from doing the job twice.
Inspect:
Jet-pump bearing
Make sure it isn't rough or excessively loose.
Seals
Replace damaged or worn seals.
O-rings
Inspect for:
- Cuts
- Flattening
- Hardening
- Cracks
Coupler
Check for:
- Damaged splines
- Excessive wear
- Cracks
Impeller
Check for damage and correct clearance.
Wear ring
Check for excessive clearance and damage.
Step 8 — Install The New Driveshaft
Installation is essentially the reverse of removal, but don't simply reverse every step blindly.
Follow the exact service procedure for:
- Shaft orientation
- Grease
- Seal lubrication
- O-rings
- Circlips
- Coupler engagement
- Torque specifications
- Sealant
Yamaha service procedures, for example, specify particular bearing/shaft installation methods and grease locations. ManualShelf
Sea-Doo procedures likewise specify service products and torque values in the relevant exploded views and installation sections. ManualsLib
Step 9 — Make Sure The Shaft Is Properly Seated
Before reinstalling the jet pump, confirm the driveshaft is correctly engaged at the engine/PTO end.
Check:
- Splines fully engaged
- Correct shaft position
- Sealing components correctly positioned
- Circlips correctly installed
- No damaged O-rings
- No binding
A shaft that isn't fully seated can cause serious problems once the engine starts.
Step 10 — Reinstall The Jet Pump
Slide the jet pump back into position while correctly aligning the shaft.
Some Yamaha service information specifically notes that the drive-shaft spline must be aligned with the corresponding intermediate-shaft spline during pump installation. manualzz.com
Then reinstall:
- Pump hardware
- Hoses
- Reverse components
- Steering components
- Speed sensor
- Intake components
Torque everything according to the service manual.
Step 11 — Check Shaft Alignment
This is particularly important if the engine, engine mounts or related components have also been disturbed.
An incorrectly aligned drivetrain can produce:
- Vibration
- Premature bearing wear
- Seal problems
- Driveshaft damage
- Coupler wear
Some Sea-Doo service information specifically includes engine/jet-pump alignment procedures. ManualsLib
Don't skip alignment simply because the new shaft physically fits.
Step 12 — Test The Jet Ski
Before taking the ski straight to full throttle, check everything carefully.
Look for:
- Water leaks
- Oil leaks where applicable
- Abnormal noises
- Vibration
- Correct reverse operation
- Correct steering
- Normal acceleration
- Normal top speed
Start with a controlled test rather than immediately running at maximum RPM.
Common Driveshaft Replacement Mistakes
Installing The Wrong Shaft
Always match the exact application.
Reusing Damaged Seals
A new shaft with an old damaged seal can quickly create another problem.
Ignoring The Bearing
A worn bearing can damage the new shaft.
Ignoring The Impeller
An unbalanced impeller can create vibration that may be incorrectly blamed on the new driveshaft.
Not Checking Runout
A shaft can look straight but still fail the factory runout specification.
Forgetting Alignment
A drivetrain that isn't correctly aligned can cause premature wear.
Guessing Torque Values
Use the manufacturer's specifications for the exact model.
Can You Replace Just The Driveshaft?
Yes—if the rest of the driveline is healthy.
But before fitting the replacement, inspect:
Driveshaft + bearings + seals + impeller + wear ring + coupler
If the old shaft failed because of a serious impact, for example, there may be damage to several of these components.
What Causes Jet Ski Driveshaft Failure?
Common causes include:
Impact damage
Hitting an underwater object can damage the impeller and shaft.
Bearing failure
A failed bearing can allow the shaft to run incorrectly.
Corrosion
Water intrusion and corrosion can damage shaft surfaces and splines.
Misalignment
Incorrect engine/pump alignment can place additional loads on the driveline.
Excessive vibration
A damaged impeller can transmit abnormal loads through the shaft.
Worn coupler or splines
Excessive play at either end can damage the shaft and associated components.
Driveshaft vs Impeller vs Bearing
If a jet ski is vibrating, here's a useful starting point:
| Symptom | Driveshaft | Impeller | Bearing |
|---|---|---|---|
| Vibration at high RPM | ✅ | ✅ | ✅ |
| Bent component | ✅ | ✅ | ❌ |
| Damaged blades | ❌ | ✅ | ❌ |
| Shaft runout | ✅ | ❌ | ❌ |
| Grinding noise | Possible | Possible | ✅ |
| Excessive shaft play | Possible | ❌ | ✅ |
| Cavitation | Possible | ✅ | Possible |
| Damaged splines | ✅ | Possible | ❌ |
This is why a proper inspection is more useful than simply replacing whichever part looks easiest to access.
Final Thoughts
Replacing a jet ski driveshaft is a job where correct diagnosis and installation matter just as much as the replacement part itself.
The basic process is:
Remove pump → disconnect shaft → inspect driveline → compare replacement → install shaft → align → reinstall pump → test
The exact procedure can be very different between a Sea-Doo, Yamaha WaveRunner and Kawasaki Jet Ski. Yamaha service manuals, for example, can require dedicated tools and pressing procedures for the shaft and bearings, while Sea-Doo designs may involve PTO sealing rings, floating rings and model-specific removal tools. manualzz.com
If you're replacing a damaged shaft, don't automatically install the new one and move on. Find out why the original failed and inspect the impeller, bearings, seals, coupler and alignment at the same time.