
12th Aug 2026
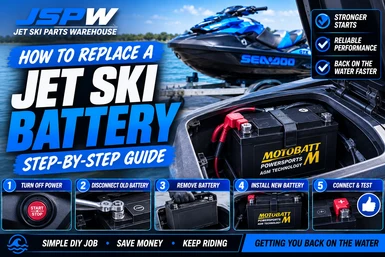
How To Replace A Jet Ski Battery: A Step-By-Step Guide
A healthy battery is essential for reliable starting and the operation of your jet ski's electronics. When a battery begins to fail, you may experience slow cranking, clicking from the starter solenoid or a ski that simply refuses to start.
Fortunately, replacing a jet ski battery is usually a straightforward job that can be completed with basic tools.
Whether you own a Sea-Doo, Yamaha or Kawasaki, here's how to replace your battery correctly and safely.
Signs Your Jet Ski Battery Needs Replacing
Before buying a new battery, look for the common signs of battery failure:
-
Slow engine cranking
-
Clicking when pressing the start button
-
Intermittent starting
-
Display resetting during starting
-
Battery repeatedly going flat
-
Battery won't hold a charge
-
Corroded or damaged terminals
-
Swollen or damaged battery case
Keep in mind that a flat battery doesn't automatically mean it's faulty. Charging-system problems, electrical drains or long periods of storage can also cause a battery to discharge.
Step 1: Get The Correct Replacement Battery
Don't choose a battery based on physical size alone.
The replacement should meet the specifications required for your particular jet ski, including:
-
Battery type
-
Dimensions
-
Terminal orientation
-
Voltage
-
Capacity
-
Cold Cranking Amps (CCA)
Most modern PWCs use a 12-volt powersports battery, but specifications vary considerably between models.
AGM batteries are commonly used because they're sealed, vibration resistant and well suited to marine and powersports applications.
Always check the manufacturer's specifications or cross-reference your existing battery before ordering.
Step 2: Turn Everything Off
Before removing the battery:
-
Make sure the engine is off.
-
Remove the key or safety lanyard.
-
Switch off accessories.
-
Allow the electrical system to shut down.
Never work around the battery while the engine is running.
Step 3: Locate The Battery
Battery location varies between jet skis.
Depending on the model, it may be:
-
Under the seat
-
Inside the engine compartment
-
Behind a removable access panel
-
Inside a front storage area
Remove any panels necessary to access it properly.
Step 4: Inspect The Area
Before disconnecting anything, inspect the battery compartment.
Look for:
-
Corrosion
-
Loose cables
-
Damaged wiring
-
Water accumulation
-
Broken battery straps
-
Damaged terminals
It's also a good idea to take a photo of the battery connections before removing them.
This gives you a quick reference when installing the replacement.
Step 5: Disconnect The Negative Terminal First
When removing a jet ski battery, disconnect the negative (-) terminal first.
Then disconnect the positive (+) terminal.
Removal Order:
Negative (-) FIRST → Positive (+) SECOND
Disconnecting the negative cable first reduces the chance of accidentally creating a short circuit between the positive terminal and a grounded metal component.
Step 6: Remove The Battery
Release the battery retaining strap or bracket.
Carefully lift the battery from its compartment.
Jet ski batteries can be heavier than they look, so keep the battery upright and use both hands where possible.
With the battery removed, clean the battery tray and inspect it for corrosion or damage.
Step 7: Compare The New And Old Batteries
Before installation, place the batteries side by side.
Confirm:
-
Overall dimensions match
-
Positive terminal is on the correct side
-
Negative terminal is on the correct side
-
Terminal type is correct
-
New battery fits the original mounting system
This is much easier to check before the battery is installed.
Step 8: Install The New Battery
Place the new battery securely into the battery tray.
Make sure it:
-
Sits flat
-
Doesn't move excessively
-
Doesn't contact moving or hot components
-
Is secured with the original strap or bracket
A loose battery can suffer internal damage from vibration and rough water.
Step 9: Connect The Positive Terminal First
Installation is the opposite of removal.
Connect the positive (+) terminal first.
Then connect the negative (-) terminal.
Installation Order:
Positive (+) FIRST → Negative (-) SECOND
Make sure both connections are clean and secure.
Don't overtighten small battery terminal bolts.
Step 10: Protect The Connections
Once everything is connected, apply suitable terminal protection or dielectric grease where appropriate.
This can help protect the terminals against:
-
Salt
-
Moisture
-
Corrosion
This is particularly important for jet skis regularly used in saltwater.
Step 11: Test The Jet Ski
Before reinstalling all covers and panels, check that the electrical system operates correctly.
Confirm:
-
Display powers up normally
-
No unexpected warning messages appear
-
Starter cranks strongly
-
Engine starts normally
If the starter still turns slowly with a new, fully charged battery, investigate the cables, earth connections, starter solenoid and starter motor.
What Voltage Should A Jet Ski Battery Have?
A fully charged 12-volt lead-acid or AGM battery will typically measure around 12.6–12.8 volts at rest.
However, resting voltage alone doesn't tell the whole story.
A battery can show reasonable voltage with no load but drop dramatically when the starter is engaged.
A proper load test is a better way to determine battery health.
Why Does My New Battery Keep Going Flat?
If you've recently replaced the battery and it continues to discharge, don't automatically assume the new battery is faulty.
Possible causes include:
-
Charging-system fault
-
Loose battery connection
-
Corroded earth connection
-
Electrical accessory drawing power
-
Faulty regulator/rectifier
-
Long periods without use
Finding the underlying problem can prevent you from unnecessarily replacing another battery.
How To Make Your Jet Ski Battery Last Longer
A few simple habits can significantly improve battery life:
-
Keep terminals clean and tight.
-
Use a quality maintenance charger during long-term storage.
-
Don't leave the battery completely discharged.
-
Inspect terminals for corrosion.
-
Keep the battery securely mounted.
-
Check battery condition before the riding season.
-
Disconnect or maintain the battery during extended storage.
Jet ski batteries often spend far more time sitting than operating, making proper storage particularly important.
Need A Replacement Jet Ski Battery?
Jet Ski Parts Warehouse stocks batteries and starting-system components for a wide range of Sea-Doo, Yamaha and Kawasaki jet skis, along with:
-
Starter motors
-
Starter solenoids
-
Starter drives
-
Battery cables
-
Electrical components
-
Genuine OEM parts
-
Premium aftermarket replacement parts
Not sure which battery fits your jet ski?
Contact JSPW with your make, model and year, and we can help identify the correct replacement.
Final Thoughts
Replacing a jet ski battery is a relatively simple maintenance job, but getting the basics right matters.
Choose the correct battery, secure it properly and remember the connection sequence:
Removing: Negative first, then positive.
Installing: Positive first, then negative.
With a healthy battery and clean electrical connections, your jet ski should deliver strong, reliable starting every time you're ready to hit the water.