
19th Aug 2026
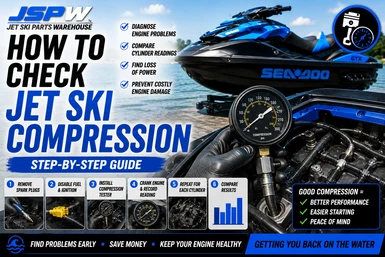
How To Check Jet Ski Compression: A Step-By-Step Guide
A compression test is one of the most useful diagnostic checks you can perform on a jet ski engine.
If your Sea-Doo, Yamaha or Kawasaki is difficult to start, running rough, lacking power or misfiring, checking cylinder compression can help determine whether the problem is electrical, fuel-related or potentially inside the engine.
The test itself is relatively simple, but interpreting the results correctly is important.
Here's how to check your jet ski's compression and what the readings can tell you.
What Is Engine Compression?
Inside each cylinder, the piston moves upward and compresses the air or air/fuel mixture before combustion.
For the engine to operate correctly, the cylinder must be able to seal effectively.
That seal depends on components including:
-
Piston
-
Piston rings
-
Cylinder or cylinder sleeve
-
Cylinder head
-
Head gasket
-
Intake and exhaust valves on four-stroke engines
If one of these components is damaged or excessively worn, compression can drop.
Signs Your Jet Ski May Have Low Compression
A compression test is worth performing if you're experiencing:
-
Hard starting
-
Engine cranks but won't start
-
Rough idle
-
Misfiring
-
Loss of acceleration
-
Reduced top speed
-
One cylinder not firing
-
Excessive oil consumption
-
Unusual engine noises
-
Engine failure following an overheating event
Low compression doesn't automatically tell you which component has failed, but it can quickly identify a cylinder that requires further investigation.
What You'll Need
To perform a basic compression test you'll need:
-
Compression tester with the correct adaptor
-
Spark plug socket
-
Ratchet
-
Fully charged battery
-
Basic hand tools
A screw-in compression gauge is generally preferable because it seals securely into the spark plug hole.
Step 1: Check The Battery
Start with a fully charged battery.
This is more important than many people realise.
A weak battery turns the engine more slowly, which can produce lower compression readings and make your results misleading.
If you're comparing cylinders, you want the cranking speed to remain as consistent as possible throughout the test.
Step 2: Follow The Correct Testing Procedure For Your Model
Before testing, check the workshop manual for your exact engine.
Procedures can differ between models, particularly regarding:
-
Engine temperature
-
Throttle position
-
Fuel disabling
-
Ignition disabling
-
Required cranking procedure
Following the manufacturer's procedure gives you the most meaningful results.
Step 3: Disable Fuel And Ignition
You don't want the engine starting while the compression gauge is installed.
Depending on the model, the correct procedure may involve disabling:
-
Fuel injectors
-
Fuel pump
-
Ignition coils
-
Another part of the starting or engine-management system
Use the manufacturer's recommended procedure rather than randomly disconnecting components.
Step 4: Remove The Spark Plugs
Remove the ignition coils or plug leads carefully.
Then remove all of the spark plugs.
Taking all plugs out allows the starter motor to turn the engine more consistently during testing.
This is also a good opportunity to inspect the plugs.
Compare them for:
-
Carbon deposits
-
Fuel fouling
-
Oil contamination
-
Overheating
-
Unusual differences between cylinders
A plug that looks dramatically different from the others may provide another clue.
Step 5: Install The Compression Tester
Thread the compression tester into the first cylinder's spark plug hole.
Start it by hand to avoid damaging the cylinder-head threads.
Make sure the fitting seals correctly.
A leaking adaptor can produce an artificially low reading.
Step 6: Crank The Engine
Crank the engine according to the correct procedure for your model until the gauge stops increasing.
Record the reading.
For example:
Cylinder 1: ____ PSI
Release the pressure from the gauge before moving to the next cylinder.
Step 7: Test Every Cylinder
Repeat exactly the same process for each cylinder.
For example:
-
Cylinder 1: 150 PSI
-
Cylinder 2: 148 PSI
-
Cylinder 3: 151 PSI
Those figures are only an example—not a specification for your particular jet ski.
The actual expected pressure varies significantly between engines.
Don't Rely On A Universal PSI Number
One of the biggest mistakes when checking jet ski compression is searching online for a single number that supposedly applies to every engine.
There isn't one.
Compression readings can vary depending on:
-
Engine design
-
Two-stroke or four-stroke
-
Compression ratio
-
Valve timing
-
Decompression systems
-
Engine temperature
-
Cranking speed
-
Altitude
-
Compression gauge
-
Testing procedure
Always compare your results with the workshop specification for your exact model where available.
Cylinder-To-Cylinder Difference Is Important
The relationship between cylinders can be just as useful as the actual PSI reading.
Imagine a three-cylinder engine produces:
Cylinder 1 – 150 PSI
Cylinder 2 – 149 PSI
Cylinder 3 – 105 PSI
Even without knowing the exact factory specification, Cylinder 3 clearly deserves further investigation.
By comparison:
150 / 148 / 151 PSI
shows much greater consistency.
The manufacturer's specifications should ultimately determine whether the readings are acceptable.
What Causes Low Compression?
Several problems can cause low compression.
Worn Piston Rings
Worn rings allow pressure to escape past the piston into the crankcase.
Possible symptoms include:
-
Low compression
-
Reduced performance
-
Increased oil consumption on four-strokes
-
Excessive blow-by
Damaged Piston
A cracked, scored, melted or otherwise damaged piston can cause significant compression loss.
This can occur after:
-
Overheating
-
Detonation
-
Lubrication failure
-
Lean running
-
Foreign-object damage
Cylinder Damage
Scoring or excessive wear inside the cylinder can prevent the rings from sealing correctly.
Depending on the engine, repair may require:
-
Honing
-
Reboring
-
Replacement sleeve
-
Cylinder replacement
Valve Problems
On four-stroke engines, compression can escape through an intake or exhaust valve that isn't sealing correctly.
Possible causes include:
-
Burnt valve
-
Bent valve
-
Incorrect valve clearance
-
Damaged valve seat
-
Carbon deposits
Head Gasket Failure
A damaged head gasket can allow compression to escape between cylinders or into the cooling system.
Other symptoms may include:
-
Overheating
-
Coolant loss on applicable engines
-
Abnormal combustion
-
Contamination
What If All Cylinders Read Low?
If every cylinder produces similarly low readings, don't immediately assume the entire engine is worn out.
First check:
-
Battery condition
-
Cranking speed
-
Compression gauge
-
Gauge adaptor
-
Testing procedure
-
Throttle position where applicable
-
Whether the engine should be tested warm or cold
A testing error can affect every cylinder.
What If Only One Cylinder Is Low?
One significantly lower cylinder is more concerning.
Possible causes include:
-
Damaged piston
-
Broken or worn piston rings
-
Cylinder scoring
-
Valve damage
-
Head gasket problem
Further diagnosis is usually required before dismantling the engine.
Compression Test vs Leak-Down Test
A compression test tells you whether a cylinder can build pressure.
A leak-down test can help determine where that pressure is escaping.
During a leak-down test, compressed air is introduced into the cylinder and the amount of leakage is measured.
Depending on the engine and fault, air escaping through different areas can help identify problems with:
-
Intake valves
-
Exhaust valves
-
Piston rings
-
Head gasket
If a compression test identifies a problem, a leak-down test can be a useful next diagnostic step, particularly on four-stroke engines.
Can Low Compression Be Fixed With New Spark Plugs?
No.
Fresh spark plugs may improve a weak ignition problem, but they cannot restore mechanical compression.
If the engine genuinely has low compression, the underlying mechanical problem needs to be diagnosed and repaired.
This is why performing basic diagnostic tests before replacing multiple parts can save a lot of money.
Reinstalling The Spark Plugs
Once testing is complete:
-
Remove the compression gauge.
-
Inspect the spark plugs.
-
Replace the plugs if required.
-
Start each plug by hand.
-
Tighten to the manufacturer's specified torque.
-
Reinstall the ignition coils or leads.
-
Reconnect anything disabled during testing.
Double-check that everything is connected correctly before starting the engine.
Need Engine Rebuild Parts?
If your compression test identifies an internal engine problem, Jet Ski Parts Warehouse stocks a huge range of engine components for Sea-Doo, Yamaha and Kawasaki jet skis, including:
-
Pistons
-
Piston rings
-
Cylinder sleeves
-
Complete cylinders
-
Connecting rods
-
Crankshafts
-
Valves
-
Valve components
-
Head gaskets
-
Top-end gasket kits
-
Complete engine rebuild kits
-
Genuine OEM parts
-
Premium aftermarket parts
-
Quality used OEM engine components
If you're unsure which parts suit your engine, contact JSPW with your make, model, year and OEM part number where available, and we can help identify the correct components.
Final Thoughts
A compression test is one of the quickest ways to assess the basic mechanical health of your jet ski engine.
The important thing isn't simply getting the highest PSI number possible. It's testing every cylinder under consistent conditions and comparing the results with the specifications for your particular engine.
If one cylinder is significantly different from the others, don't keep replacing electrical or fuel-system parts hoping the problem will disappear.
Diagnose the cause first.
It could save you considerable time and money—and help get your jet ski back on the water sooner.